
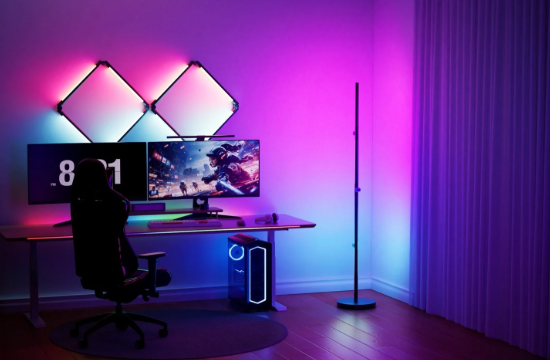
Choosing the Right LED Strip Lighting Setup: A Practical Guide to Power, Voltage, and Installation
Introduction: Start With the Complete Lighting Setup
LED strip lighting can work well in homes, commercial spaces, signs, displays, and architectural projects. However, choosing a strip is only one part of the installation. Voltage, power consumption, strip length, wiring, waterproofing, and the power supply all need to work together.
A good installation starts by understanding the specifications before cutting or connecting anything. This helps maintain consistent brightness and reduces problems caused by unsuitable voltage or insufficient power.
Start With the LED Strip Specifications
LED strips come in different sizes, LED densities, voltages, colors, and protection levels. Common options include 12V and 24V DC strips, while some high-voltage products operate at AC220V.
For example, a 3528 strip may contain 300 LEDs across five meters and use 4.8W per meter. A 5050 strip can offer a higher output, with some versions reaching 17W per meter. These differences affect the power supply, wiring, and expected brightness.
The cutting length also matters. Some 24V strips can be cut every six LEDs, while other models have different cutting intervals. Checking the marked cutting points before installation prevents unnecessary damage.
See also: Dutasteride for Hair Loss: A Stronger 5-Alpha Reductase Inhibitor
Calculate the Total Power Requirement
Power consumption becomes more important as the installation gets longer. To estimate the required power, multiply the strip’s wattage per meter by its total length.
For example, a 10 meter strip rated at 12W per meter requires 120W. It is sensible to allow additional capacity instead of selecting a power supply that operates continuously at its maximum rating.
This calculation should happen before purchasing or installing the components. It gives you a clearer idea of the required power capacity and helps you select compatible wiring and control equipment.
Match the Power Supply to the LED Strip
Voltage compatibility is one of the first things to check. A 12V strip requires an appropriate 12V DC supply, while a 24V strip needs a 24V DC supply. Using the wrong voltage can cause poor performance or damage.
When comparing options, an LED Power Supply factory can also provide technical information about voltage, current, wattage, and suitable applications. These details are useful when the lighting system has unusual dimensions or requires several connected sections.
The power supply should also provide enough current for the total load. For RGB systems, the controller and its maximum load should be considered alongside the strip itself. For example, a compatible RGB controller may support different output levels for 12V and 24V systems.
Consider the Installation Environment
The installation location influences which LED strip you should select. Indoor decorative lighting may not require the same protection as lighting installed near moisture or outdoors.
Some 5050 strips are available with IP65 or IP68 protection. An IP68 version can provide a higher level of protection for demanding environments. However, the exact product rating should always be checked before installation.
The power supply also needs suitable ventilation. Avoid placing it in a confined area where heat cannot escape. Proper heat management can help electrical components operate more consistently.
Choose the Right LED Strip for the Application
Different lighting projects require different strip characteristics. Cove lighting often benefits from flexible strips that can follow architectural lines. Backlighting and signage may require a different brightness level or LED density.
LED Strip Lights are available in several configurations for applications such as architectural lighting, corridors, windows, furniture, signage, pathways, and decorative installations. A 5050 strip, for example, can be used for cove lighting, contour marking, backlighting, and home projects.
Color selection is another consideration. RGBW versions can combine RGB colors with warm white, while single-color options can provide a more consistent appearance for general or architectural lighting.
Think About Length, Wiring, and Voltage Drop
Longer LED runs can experience voltage drop, which may cause the LEDs farther from the power source to appear less bright. This is one reason 24V systems are often considered for longer installations.
A 24V strip operates at twice the voltage of a 12V strip, so it can generally carry the same power with less current. This can help reduce voltage drop over suitable installation lengths.
Wiring also needs attention. Connections should be secure, correctly polarized, and suitable for the expected current. For longer runs, the installation design should account for how power reaches each section rather than assuming one connection will work equally well across the entire length.
Understand COB and SMD LED Strips
COB and SMD strips produce different visual results. Traditional SMD strips use individual LED packages, while COB strips arrange LED chips to create a more continuous light appearance.
COB strips can be useful when visible light spots are undesirable. They can provide a smoother line of illumination, which suits applications where the strip itself may be partially visible.
DekingLED also lists free-cutting 12V and 24V COB LED strips, which can help with installations where conventional cutting intervals create limitations. The appropriate cutting method still depends on the specific model.
Installation Checks Before Switching On
Before powering the system, check the voltage and power requirements. Confirm that the strip and power supply have matching voltage ratings.
• Check positive and negative connections.
• Cut only at the marked cutting points.
• Confirm the total wattage.
• Check the power supply capacity.
• Inspect connectors and wiring.
• Make sure the installation surface is clean.
• Provide suitable ventilation around electrical components.
• Check the IP rating when installing in exposed environments.
These simple checks can prevent common installation problems.
A Practical Approach to Better LED Strip Planning
A reliable LED strip installation starts with a basic specification check. Identify the required voltage, calculate the total power, measure the installation length, and consider the environment where the lighting will operate.
Shenzhen Dekingled Co., Ltd. was established in 2014 and operates from SanMing Industrial Park, Shiyan Town, Bao’an District, Shenzhen, China.
The company lists fast delivery, cost-effective solutions, technical support, and product quality among its service advantages.
It is also important to choose the strip according to the actual application instead of focusing on one specification. A low-power strip may suit furniture or subtle accent lighting, while a higher-density strip may be more appropriate where stronger illumination is needed.
Conclusion: Build the System Around the Requirements
Choosing LED strip lighting becomes easier when the entire installation is considered as one system. The strip, voltage, power supply, wiring, controller, and installation environment all influence the final result.
Start with the lighting requirement, then work through the technical specifications. Check voltage compatibility, calculate power consumption, account for voltage drop, and select the appropriate protection rating. Taking these steps before installation can help create more consistent and dependable lighting for residential, commercial, and architectural applications.